

Installation: How To Install The WHALEN-JACK With Shear
ENSURE SUPPORTING WALL IS 100% COMPLETE. WALLS MUST HAVE ALL SUPPORTING MEMBERS, BLOCKING AND BRACING COMPLETE AND CORRECTLY INSTALLED BEFORE THE WHALEN-JACK SYSTEM CAN BE INSTALLED. All WHALEN-JACK equipment must be inspected before and after every use. Scaffold showing any signs of damage or extensive use must be discarded and replaced. Consult jobsite foreman if there is any question regarding integrity of scaffold.
-
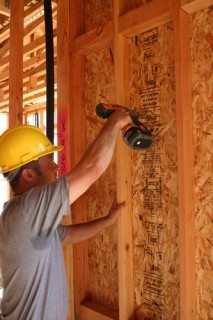
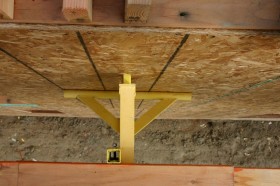
- 1. Using drill make 1-3/8 inch hole in shear (APA has acknowledged this 1-3/8 inch hole will have no effect on any APA rated sheeting)

-
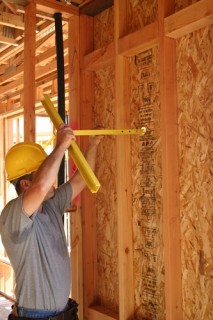
- 2. Slide square tube of Spanner Bracket through hole.

-
- 3. Nail Spanner Bracket to wall framing member using two 16 duplex nails.
-
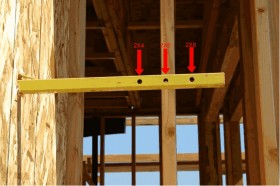
- 4. Three holes are provided to accommodate 2x4, 2x6 and 2x8 wall framing.

-
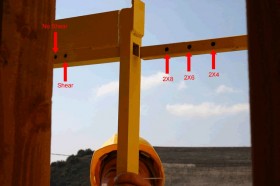
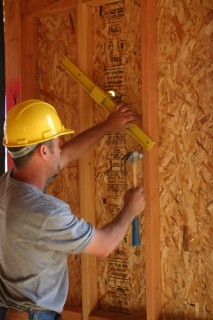
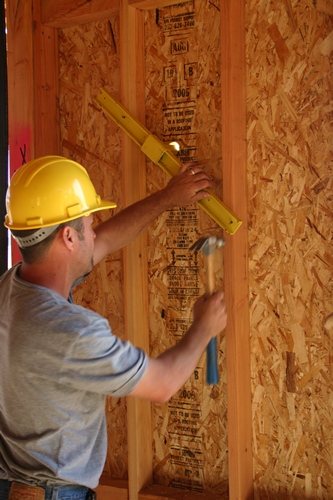
- 5. Spanner Bracket is ready to have The WHALEN-JACK installed. Slide jack over Spanner tube and pin in proper hole (two holes are provided on Jack to allow for shear or no shear).

-
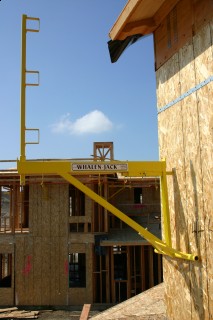
- 6. Jack is ready for planks first then handrails. All three 2x4 handrails must be installed with 8 penny nails. Handrails can be installed in outer pocket to allow three standard OSHA scaffold planks or the second pocket to accommodate two plank applications.

-
- 7. Check your OSHA regulations for allowable spacing between wall and first plank.


